Unreal Set a Speficic Camera to Active in Level
How to make the Camera in the level to be activated when the game start.

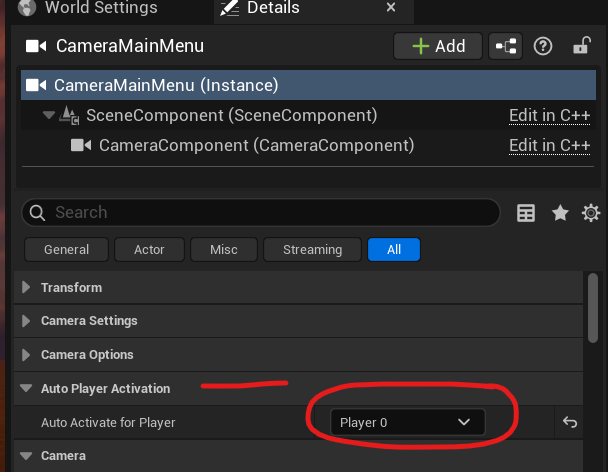
Here's a breakdown of the process:
- Locate your camera actor: In the Outliner, find the camera you want to use as the default.
- Open the Details panel: Select the camera in the Outliner, and the Details panel will display its properties.
- Find the "Auto Possess Player" setting: Navigate to the "Auto Possess Player" option, usually located under the "Rendering" or "Actor" section.
- Set to "Player 0": Change the "Auto Possess Player" setting to "Player 0". This means the camera will be possessed by the first player when the level starts.
- (Optional) Disable other cameras: If you have other cameras in the scene, you might want to disable their "Auto Possess Player" setting to avoid conflicts.
- Play the level: When you start the level, the designated camera will be active.